Auricular Blocks & Auricular Hematoma

Trauma to the ear? Infection? Hematoma or abscess?
Consider doing an an auricular block.
Auricular Blocks
The Ear
A person’s ear is not only important for hearing, it is a cosmetic nightmare if it is at all destroyed. Turns out, people will care if their ear looks bad. Yes! It’s right next to their face! It takes a lot of time, patience, understanding of the ear anatomy and knowing how to treat complications or trauma to the ear and the pain in that sensitive area. There are many different types of skin layers and shapes/sizes of the ear - including cartilage, which can be difficult to work with or around. The ear itself is a specially designed structure to funnel in sounds to the middle and inner ear. It has it’s shape and folds for a purpose. The pinna, or the outer upper ear has ridged cartilage and covered by skin, funneling ear into the external auditory canal. It’s amazing that these shapes do what they do - so you can imagine any disruption of the ear will affect one’s hearing. The helix and the antihelix are also part of the upper ear and have special ridges as well that help with hearing.
Another bit of trivia about the ear involves the tragus. Although some people use the tragus as a fashion forward place to pierce - is actually used to help protect the entrance of the ear and direct sounds into the ear. This small pointed eminence of the external ear is in front of the concha and projects backward over the meatus. You may often see hair on that spot. It’s name actually means goat - which is supposed to represent the tuft of hair like a goat’s beard on the ear. Because the tragus faces rewards, it aids in collecting sounds from behind us. These sounds that we hear from behind are delayed more than sounds arriving in front of us, so the tragus helps by assisting the brain to sense front vs. rear sound sources.
Auricular Hematomas
An auricular hematoma is a collection of blood underneath the perichondrium of the ear and typically occurs secondary to trauma, but can also come from infection or other insult to the area. The perichondrium of the ear is a layer of dense irregular connective tissue that surrounds cartilage. When it gets swollen or deformed, it can cause lack of blood supply and cartilage tissue will die. Once that happens, fibrosis occurs and scarring and deformities of the affected ear are permanent.
Auricular deformities are commonly known as “cauliflower ear” and is the result of untreated or inadequately treated auricular hematomas. It is important to recognize and drain this collection since a persistent hematoma can induce cartilage destruction with subsequent deformity of the ear.
Treatment of auricular hematomas involves drainage and evacuation of the hematoma either at the bedside or in the operating room. They often will re accumulate - I’ve seen it more than a few times! To prevent re-accumulation, it is important to place a bolster dressing post drainage procedure to close the potential space and we will talk about what this involves. Consultation with ENT or plastic surgery is beneficial as they can provide recommendations regarding diagnosis, management, and follow up. Sometimes, ENT will admit their own patients to their service if medicine is truly not needed for otherwise healthy patients.
Goals / How to
The goal of this procedure is to anesthetize the nerves of the front and back of the ear - anteriorly, you are anesthetizing the auricular temporal nerve (because it’s on the temporal side), and the posterior nerve being anesthetized is the greater auricular nerve. This will numb the entirety of the ear. Once you have your sites marked, administer what I like to call a “baby wheel” of lidocaine in your key entry points. This is a small amount of lidocaine to help numb the outer skin so your patient gets some relief before the 4 big sticks you are about to deliver. Massage those baby wheels a bit before you go in for the kill. This procedural tip is what separates the best from the great - because it truly provides the patient with some relief before dragging a needle along the entire outside of their ear.
Let’s discuss those 4 main areas of injection - in reality it’s just 2 entry spots, but you must numb the ear in a full diamond shape to get the block to be effective. Now, remember that - the diamond shape - where the top of the ear is the top point of the diamond and the lobe or bottom of the ear is the bottom portion of the diamond. Reach up and grab your earlobe. Just behind that is your first marker or key entry point, or the bottom of the diamond shape. This is the posterior sulcus. Make your first baby wheel of lidocaine here. Then, find the top point of the diamond, just behind the highest portion of the helix, and create your second wheel of lidocaine about 1 cm just above that. Then, you will need to anesthetize the sides of the diamond around the ear, injecting about 2-3 mL of lidocaine on each side to fully encompass the ear. Use a 25 or 27 g needle for injection and have a full 10 mL syringe of lidocaine prepped and ready. I prefer to use a separate TB syringe filled with lido to create my baby wheels of lidocaine, because patients barely feel it and it’s a trick of the trade I use time and time again to help with patient comfort. Another key is to stay tight around the ear - meaning really truly try to outline the ear with lidocaine in that diamond shape.
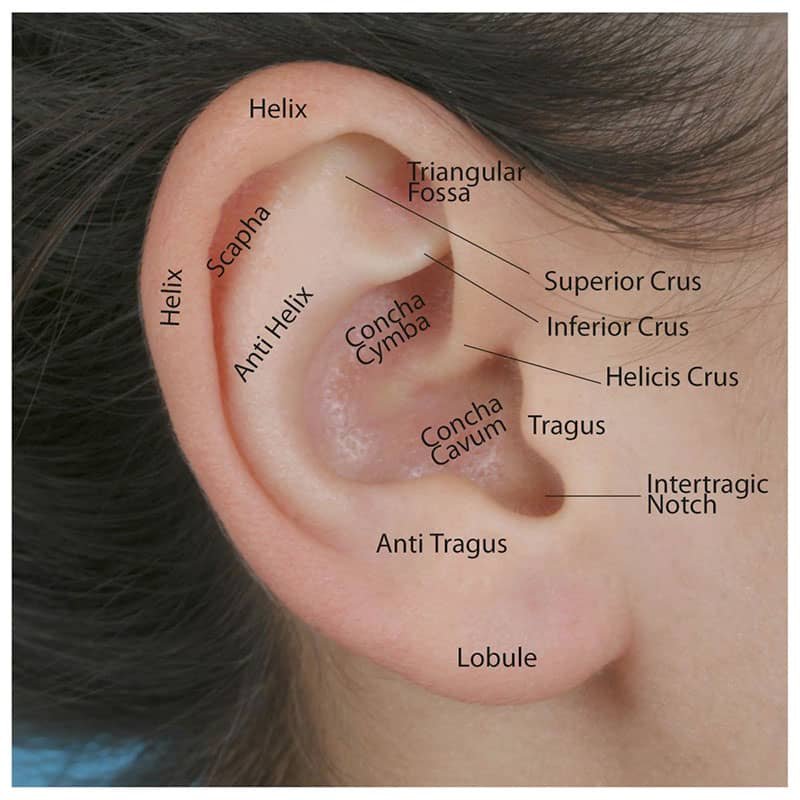
Anatomy of the ear.

Follow the diamond shape for injections
The Hematoma
Let’s get on to the hematoma portion of this procedure - draining it. You may consider (after blocking the ear) using an 18g or 20g needle with an empty syringe and stick it into the hematoma (after the ear is numb) and pull back on the syringe and suck it out. Easy right? Cool. For more stubborn or persistent hematomas, you may want to do an incision and drainage. This is simply make a small incision around or next to the hematoma to allow it to drain. The key to doing all cosmetic procedures well is to follow two simple concepts. The first one being that you understand and recognize the body's natural folds and creases, structures and curvatures. Specifically for the auricular blocks and drainage – because creating entry sites for incision and drainage can leave the damaged or scarred. When you make an incision to the ear for an I/D, stay along that inner crease just within the helix and keep the incision small, but not toos mall that the hematoma won’t drain.
Second, be familiar with Langer’s lines – or skin tension lines. They are mapped out on the body. They are very complex in the face, but super important to know. Knowing the direction of Langer's lines within a specific area of the skin is important for operations, particularly cosmetic surgery – but we all sew thing on the body and you should and can be mindful of these simple concepts. If a surgeon has a choice about where and in what direction to place an incision, he or she may choose to cut in the direction of Langer's lines. Incisions made parallel to Langer's lines may heal better and produce less scarring than those that cut across. Conversely, incisions perpendicular to Langer's lines have a tendency to pucker and remain obvious, although sometimes this is unavoidable. See an old blog of ours about ER “Weird and Wild” cases at EM-News on Langer’s Lines by clicking —> HERE.
Keloids are more common when incision is given across Langer's lines. Sometimes the exact direction of the collagen fibers are unknown, because in some regions of the body there are differences between different individuals. There is no reason not to be mindful of these areas. So, check out the various Langer’s Lines online looking at the body maps and add this to your tool box next time you cut, drain or sew.
Finally, the most important part of draining a large auricular hematoma is to add a bolster to prevent re accumulation. I call this the ear sandwich. Basically, surrounding the ear with pressure and packaging so the hematoma can’t re-accumulate. I can’t stress this enough - if this is not done correctly, all that time and effort you put into making this ear look good was wasted. I have seen patients return even with what we thought was a good bolster. Basically, you can use some soft WET or moist gauze or xeroform on the hematoma itself in a tight wad, and then place some behind the ear as well to make an ear sandwich. Some ENT’s will even suture this onto the ear. You can check out Michelle Lin’s version of this by clicking —> HERE where she gets super fancy and uses plaster to make basically an ear cast bolster!
Lastly, Something a lot of people forget is to give the patient pain medication for when the block wears off. Your job is definitely not done. If you've done an auricular block, expect to have the patient in severe pain with a throbbing ear within three to four hours or less after your procedure. I like to mix lidocaine and bupivacaine to prolong the effects of the anesthesia for my block, but everyone tolerates this block differently. If there are no other contraindications, and you plan the delivery time correctly, you can give a dose of toradol and possibly morphine or hydromorphone, depending on the patient’s pain level. Giving oral analgesics such as ibuprofen and acetaminophen are good choices. Combining these two will have stellar analgesic effects, and I highly suggest using them early and frequently post auricular block and hematoma drainage.
Since you have consulted with ENT, make sure the patient is prepped for outpatient following and knows the plan. Patients sometimes need admission for close monitoring and pain control - and it’s important to circle back around with ENT prior to dc if they have been involved - or know when the next outpatient appointment is scheduled.
See you in the pit.
-MAR
12/1/21
Really great article alert!
If you want to follow a step-by-step CME activity for this, check out this awesome article that walks you through every single step. I loved this and found it to be top notch!
Click here —> AURICULAR HEMATOMA PAPER
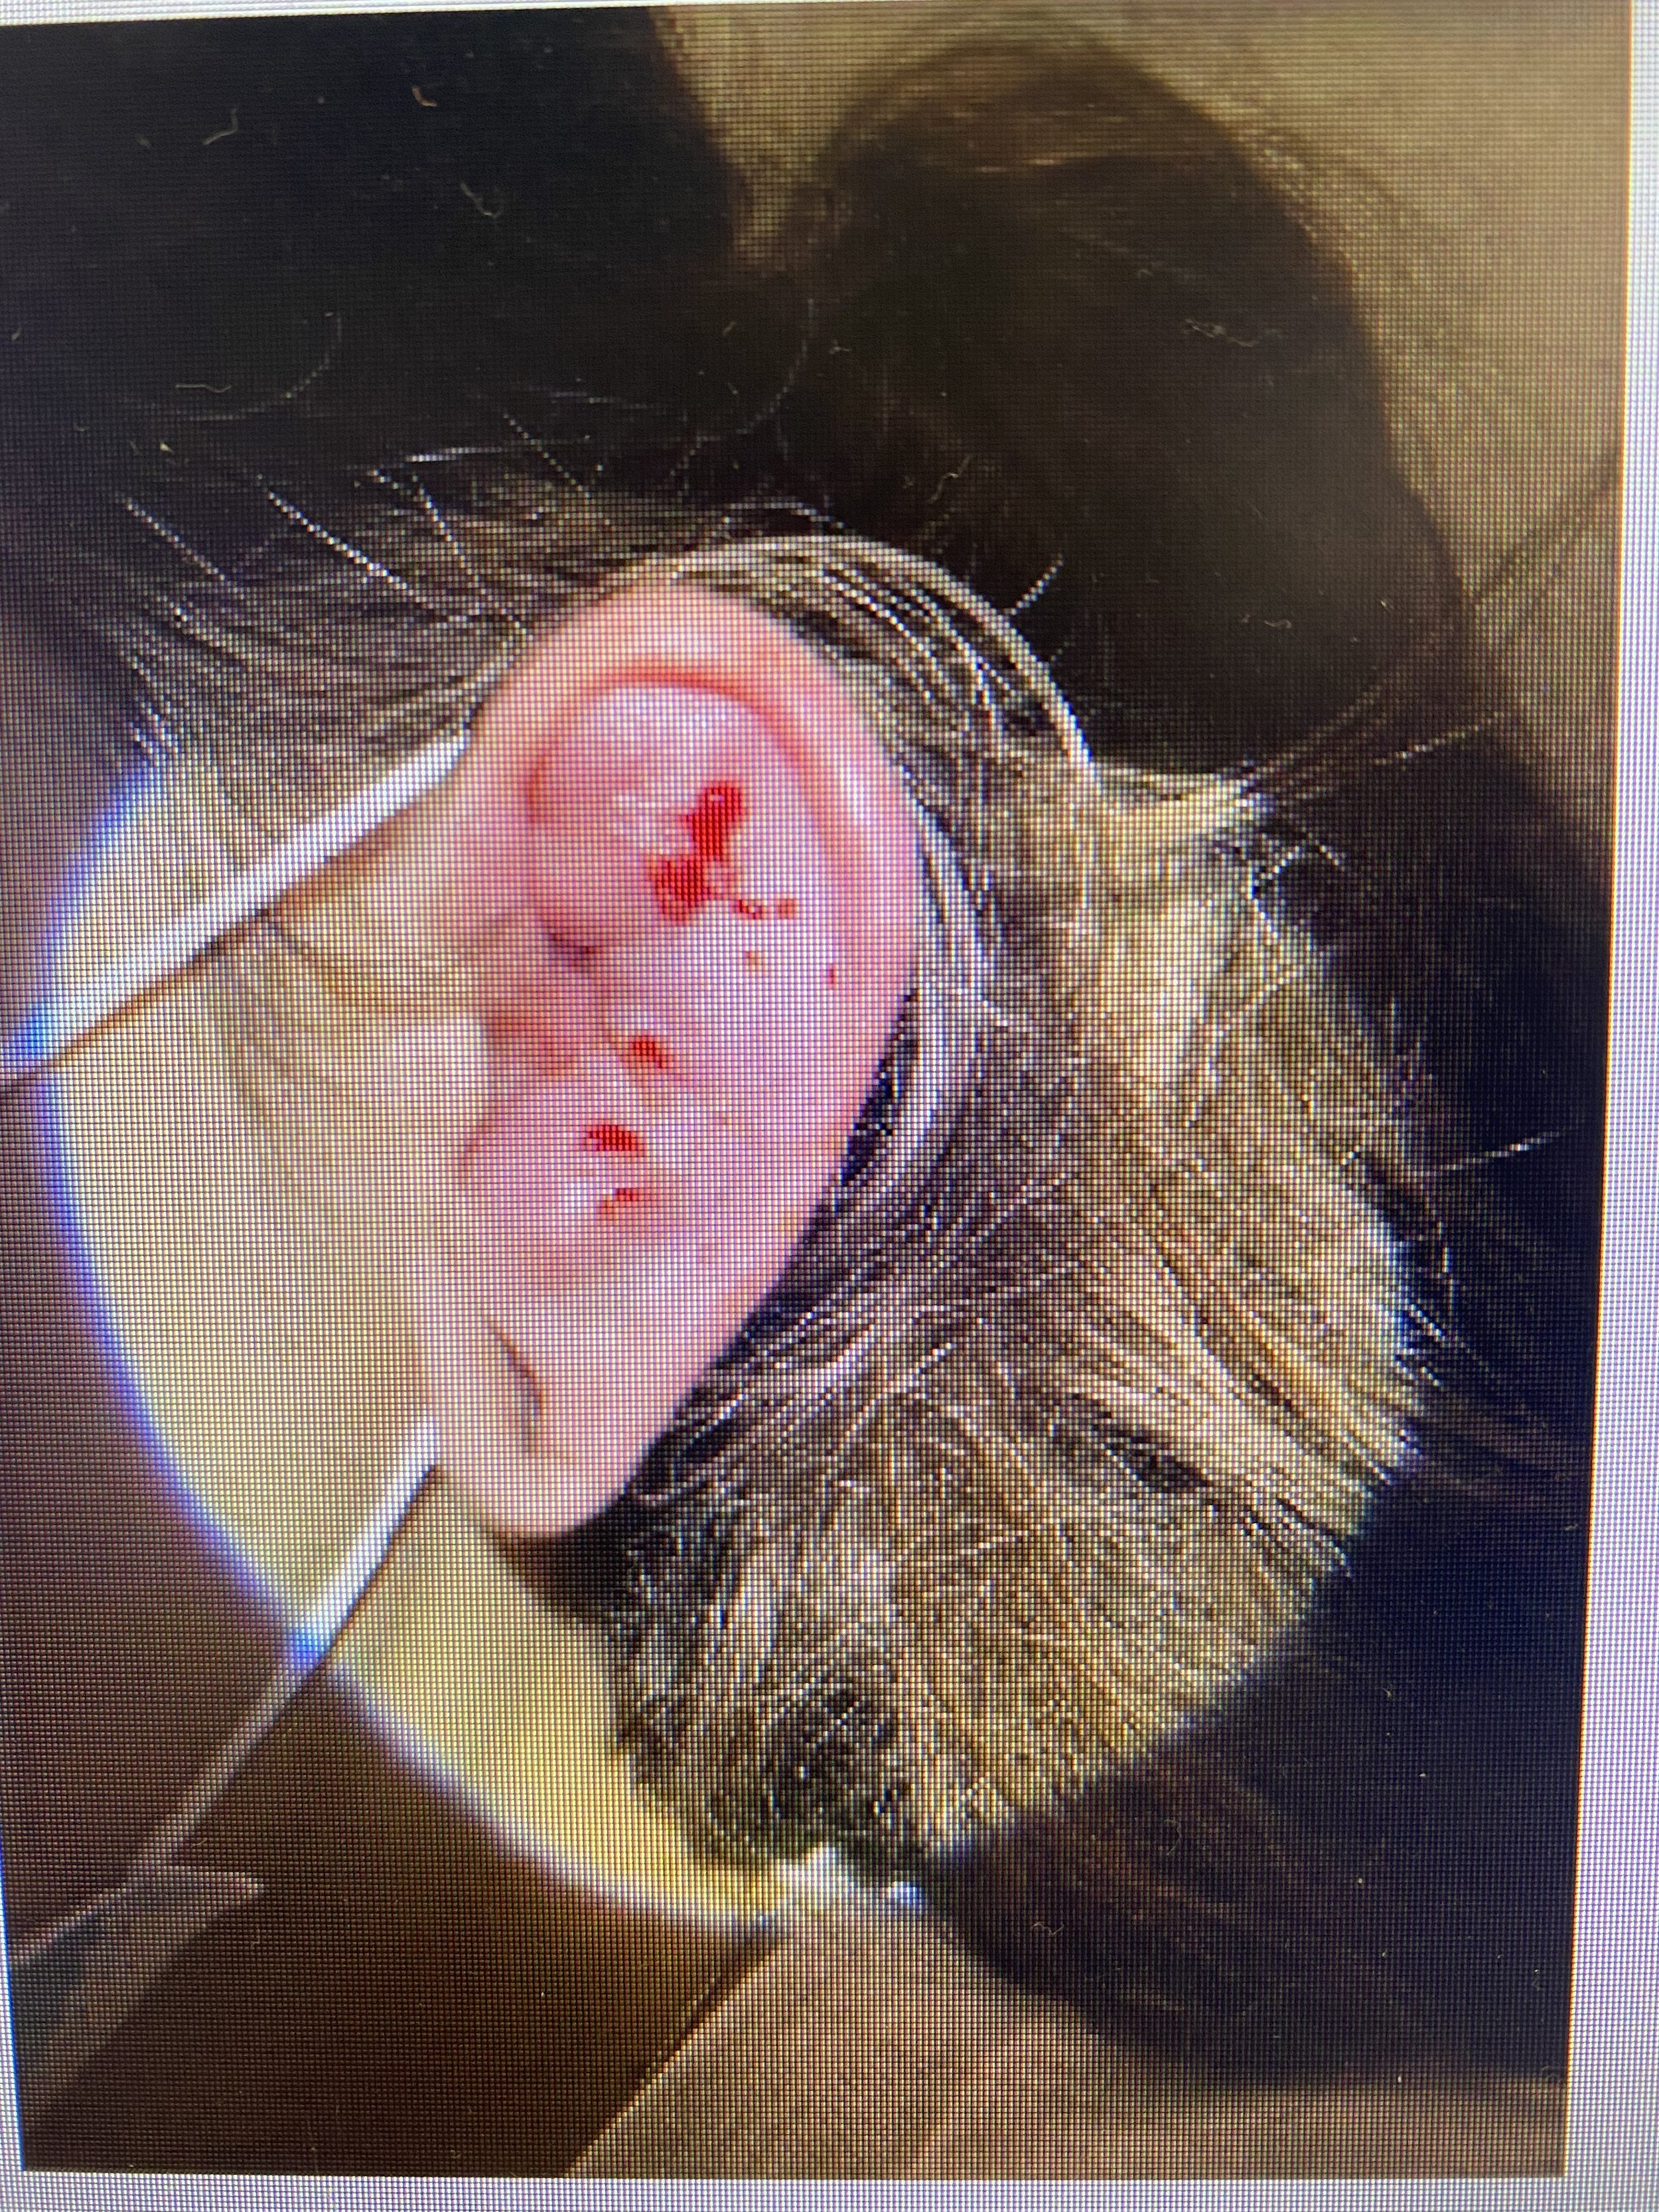
Pre-procedure
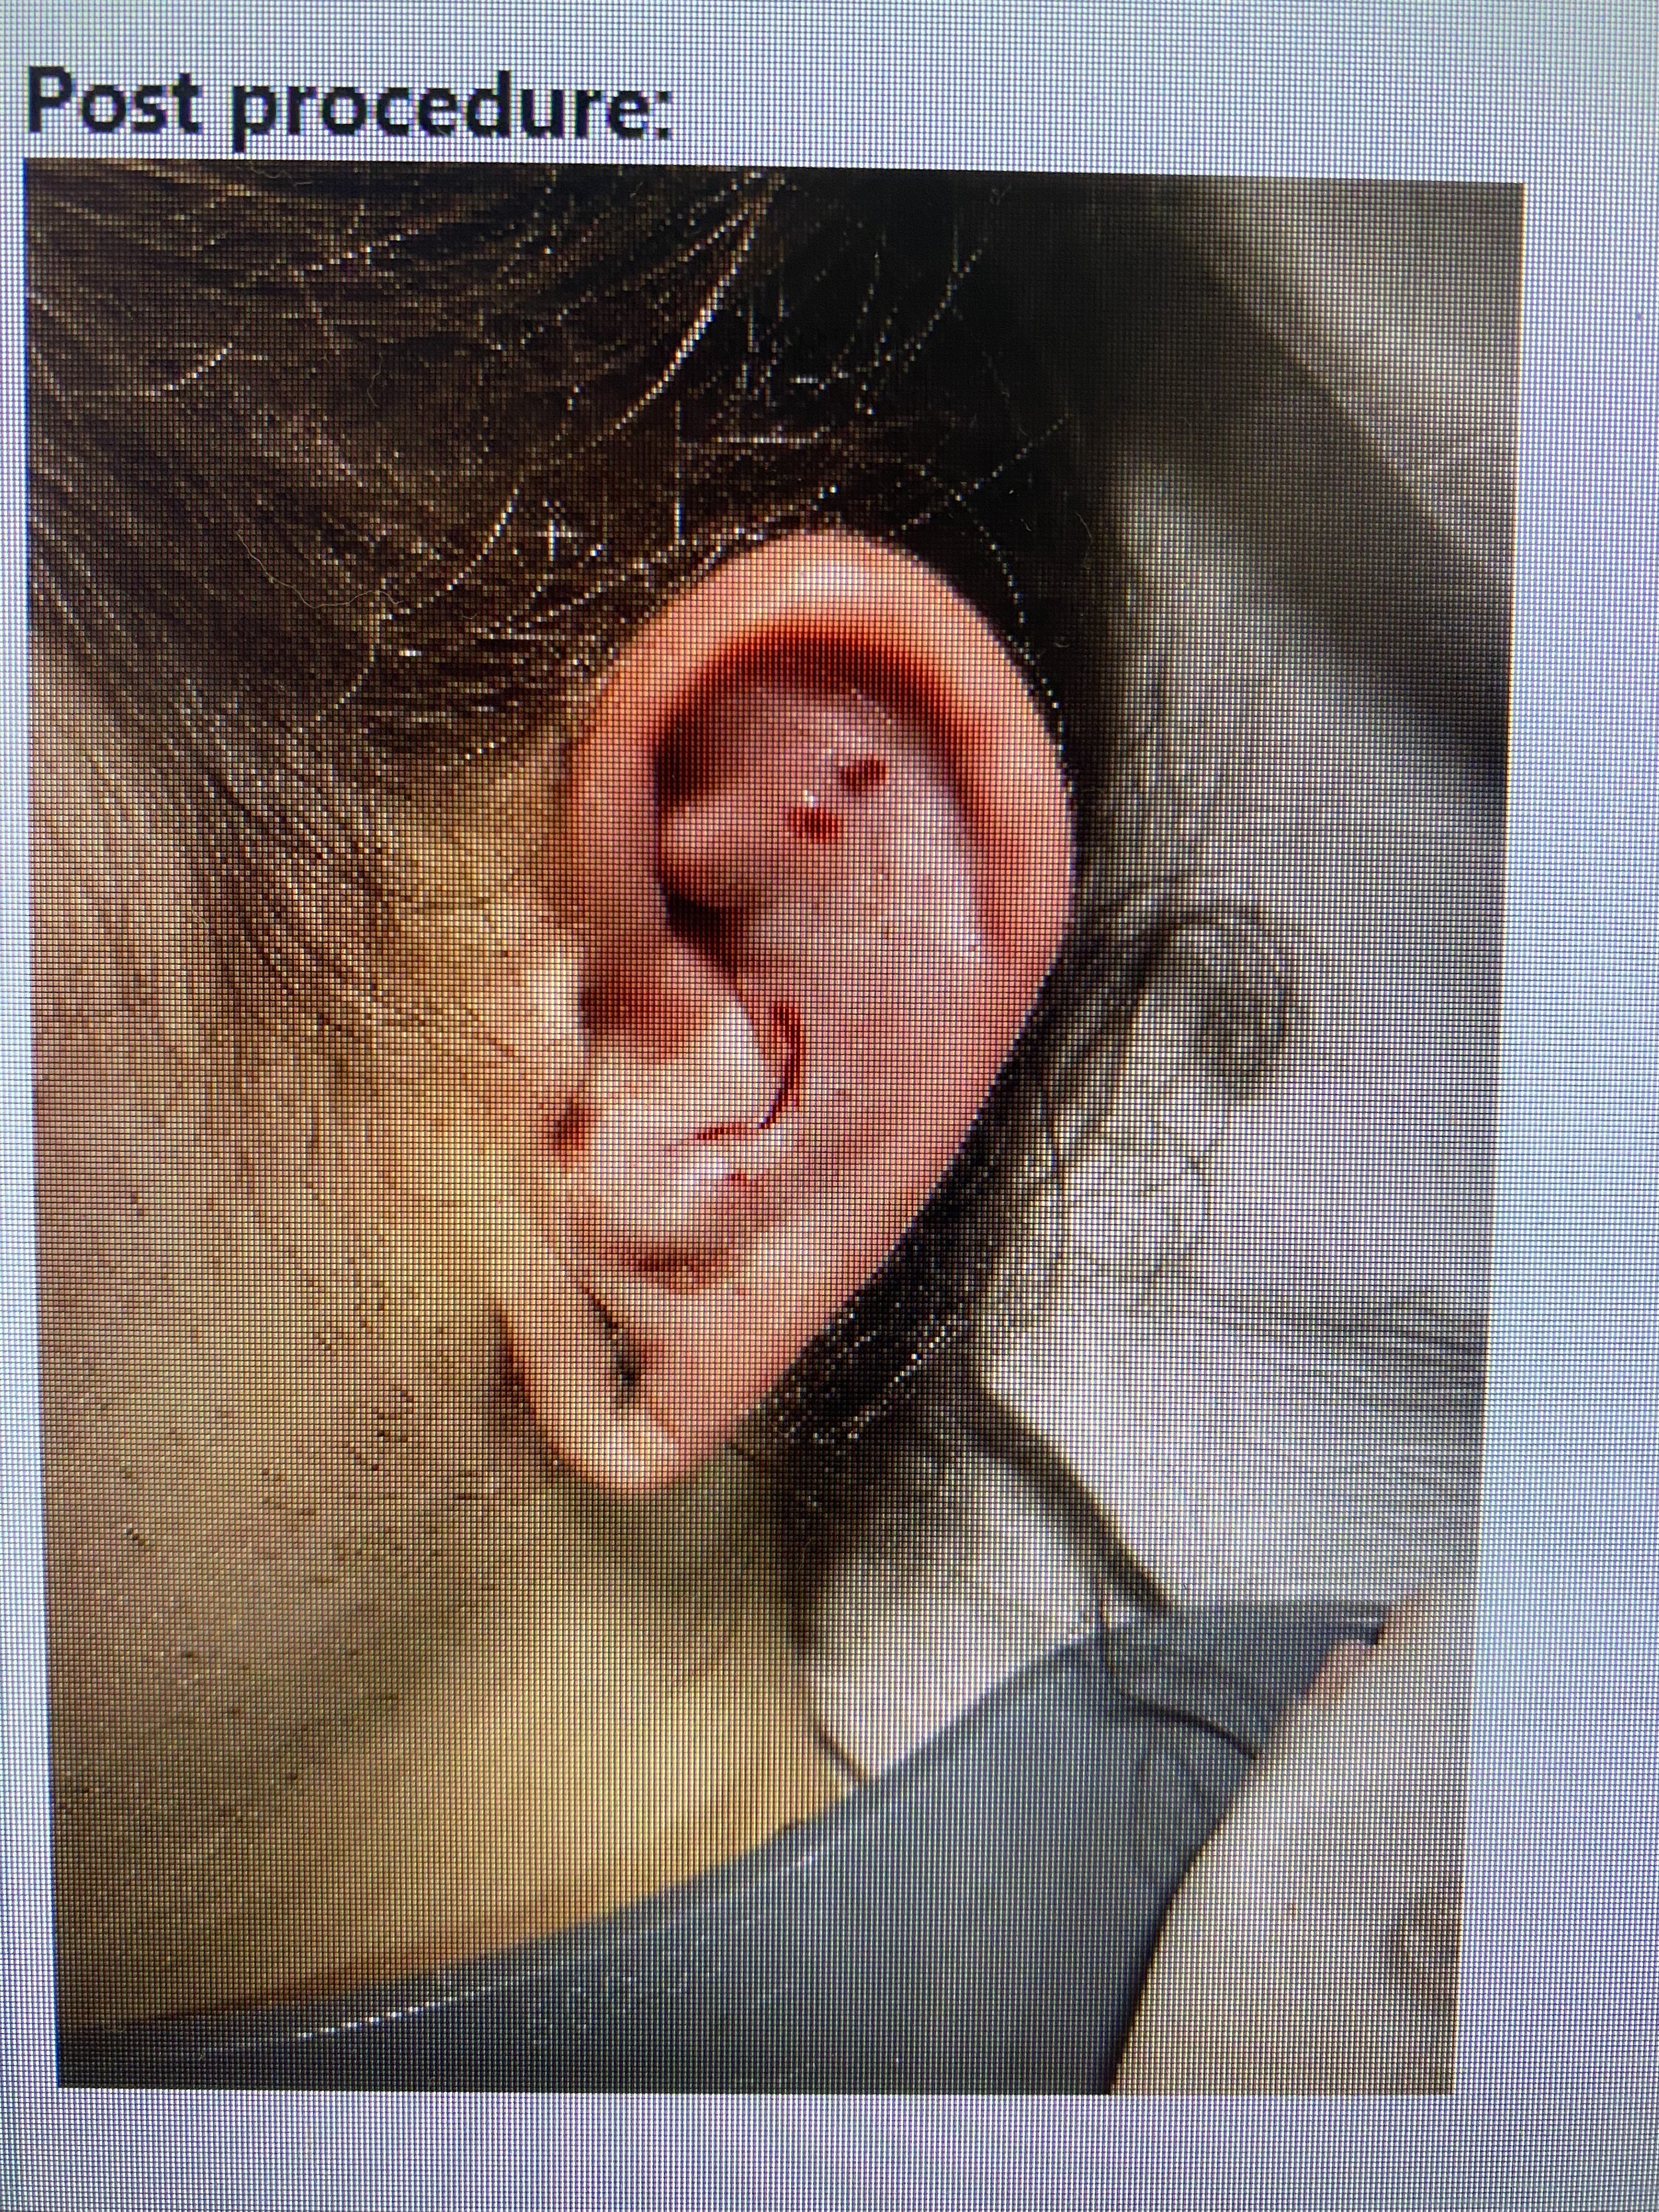
Post-procedure

Sample hand crafted bolster
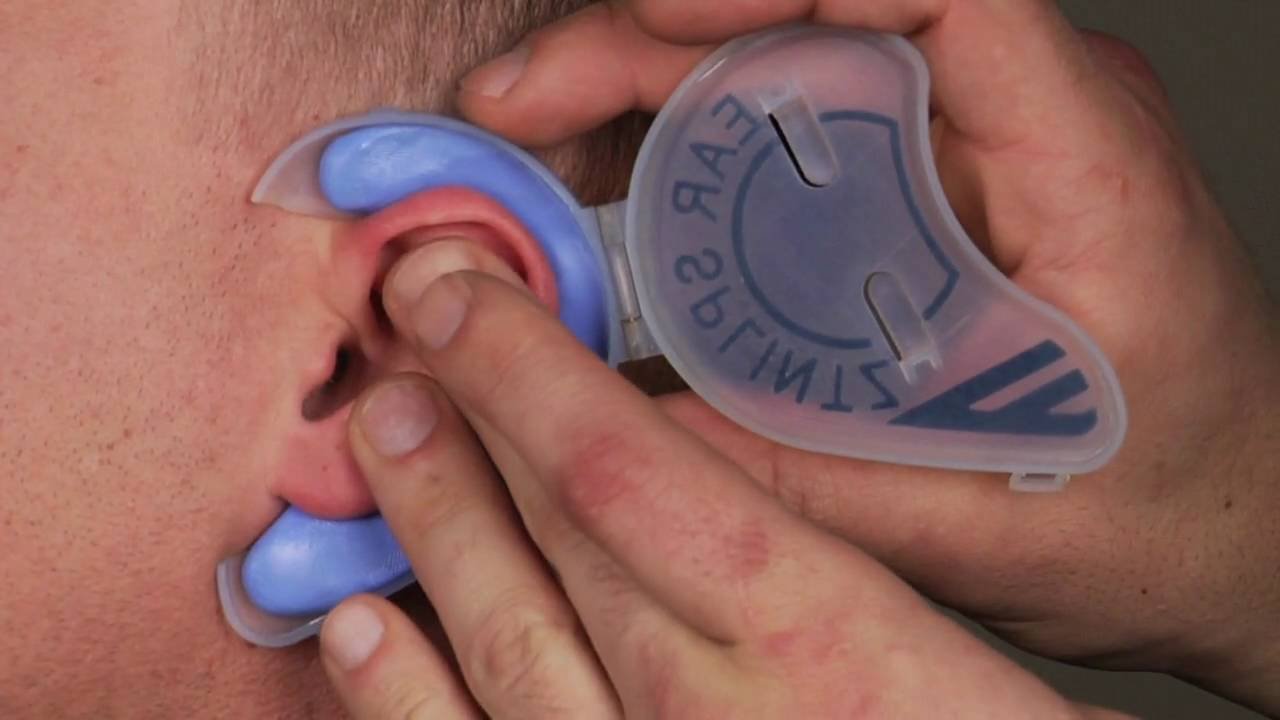
Pre-fabricated bolster